Photographing birds at take-off is very different from shooting them in flight, for a variety of reasons. In fact in some ways it’s more difficult. First, I’d best define what for me is a take-off shot. I think it’s a take-off and not a true flight shot when any of the following conditions are met: a.) the bird’s feet are still touching the perch, b.) the feet are still extended down or behind the bird from the effort of pushing off the perch and not tucked up against the body in an aerodynamic position or c.) it’s obvious from the flight posture of the bird or the presence of the just departed perch in the image that it has just taken off. I realize that this is an arbitrary definition and that technically as soon as the bird has left the perch it’s in flight but that’s how I’ll define it for this discussion.
Take-off shots have lots of appeal for many, largely because the effort required for lift-off often provides a very dynamic flight posture with the wings, tail and legs/feet in exaggerated positions compared to “simple” flight. Many novice bird photographers are intimidated by the difficulties of flight photography and attempt take-offs instead, in the mistaken assumption that they should be relatively easy. Not so.
Following are some strategies and tips for getting good take-off images that have worked for me. I hope they’ll be helpful to some of you.
Plan ahead to avoid clipping body parts – particularly the wings:
Many novice avian photographers are unpleasantly surprised by the amount of wing extension during take-off and they cut off major portions of them (or clip them) which usually makes those images obvious candidates for the garbage bin. This extension can be in any direction (up, down, horizontal or any position in-between) and it’s difficult to plan for. To give yourself the best chance to avoid clipping, give the bird space in the frame in the direction you anticipate its take-off to be and allow room for the extended wings.
In the image below I was quite close to the Willet (even had to take off my trusty teleconverter) and got quite a few shots of the bird perched on the sagebrush. Then I planned for take-off as best I could. If I had continued to shoot horizontally I knew I would cut off the wings so I switched to vertical. This didn’t give me quite enough room in front of the bird for the composition I would prefer but it beat the hell out of clipping the wings.
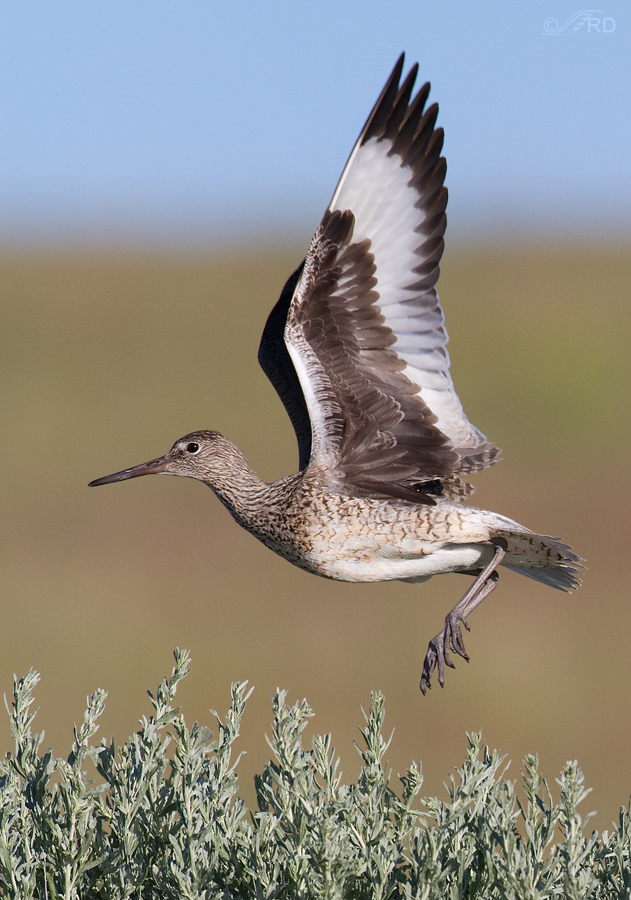
Canon 7D, 1/2500, f/7.1, ISO 640, EV 0.00, 500 f/4
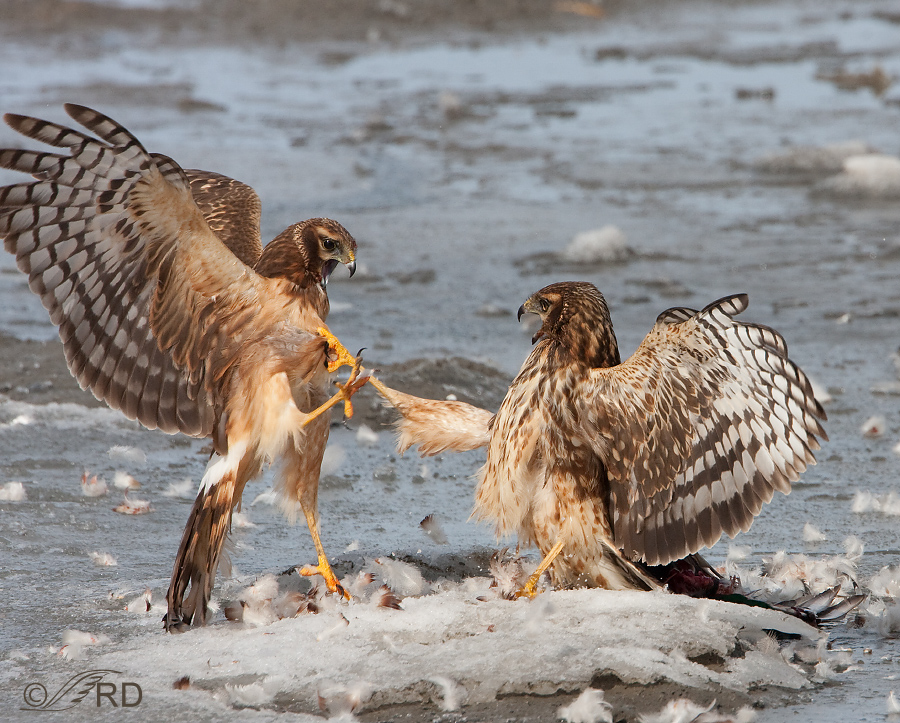
Every image has both strengths and weaknesses and the overall appeal of the shot depends on how they balance out. Occasionally the strengths can overcome an obvious flaw, even one so serious as a clipped wing. In the image below of two Northern Harriers fighting over a dead Mallard I cut off several of the primary wing feathers. Usually I would delete such an image but in this case the dynamics of the skirmish with the talon embedded in the chest of the bird on the left, the open beaks, the wing positions, the light and the leftovers of the mallard visible at lower right more than make up for the clipped wing. I took this shot quite early in my bird photography “career” (f/10 was likely not the best choice here) and I almost trashed the shot. Sure glad I didn’t. Even though it’s not a take-off image I include it here to make a point – don’t automatically delete every image where body parts have been clipped or cut off. Evaluate them first.
Canon 40D, 1/1600, f/10, ISO 500, EV 0.00, 500 f/4, 1.4 tc
Allow for the speed of the take-off:
My guess is that after clipped wings the most common fatal flaw of take-off shots is either a blurred subject from too little shutter speed or a cut off bird because the subject is already half out of the frame when the shutter was clicked. Both are problems related to the speed of take-off.
How much shutter speed you’ll need largely depends on the size of the bird (the wings and bodies of smaller birds move much more quickly than do those of larger birds) and whether or not your own personal tastes require “freezing” of the wingtips (the tips of the wings move the fastest). As a rule of thumb I generally try to get a minimum shutter speed of 1/2000 for songbirds, half that for larger birds like many raptors. But remember, that’s a minimum – if I have the light I’ll often be set at 1/3000 to 1/3500 as long as my ISO isn’t over 800. My 7D produces too much noise at higher ISO’s.
Small bird take-offs are fast! To avoid cutting off the bird as it leaves the frame I always try to keep finger pressure on the shutter to the point that it’s just about to trip – gaining that split second can make all the difference. However it can get uncomfortable and tense to be at that “hair-trigger” situation for extended periods of time. That’s what it often takes though…
In this image of a Northern Shrike, the body and head are sharp at this shutter speed though the wings are blurred, probably due to both shutter speed and depth of field. Many folks like the effect of blurred wings as it gives a sense of motion. I was actually surprised this image turned out as well as it did. The shrike was facing mostly away from me and since most birds take off in the direction they’re facing I didn’t expect to get much. But this bird very considerately looked back at me at just the right moment. The twig in front of the right wing isn’t ideal but I was still happy to get the shot.
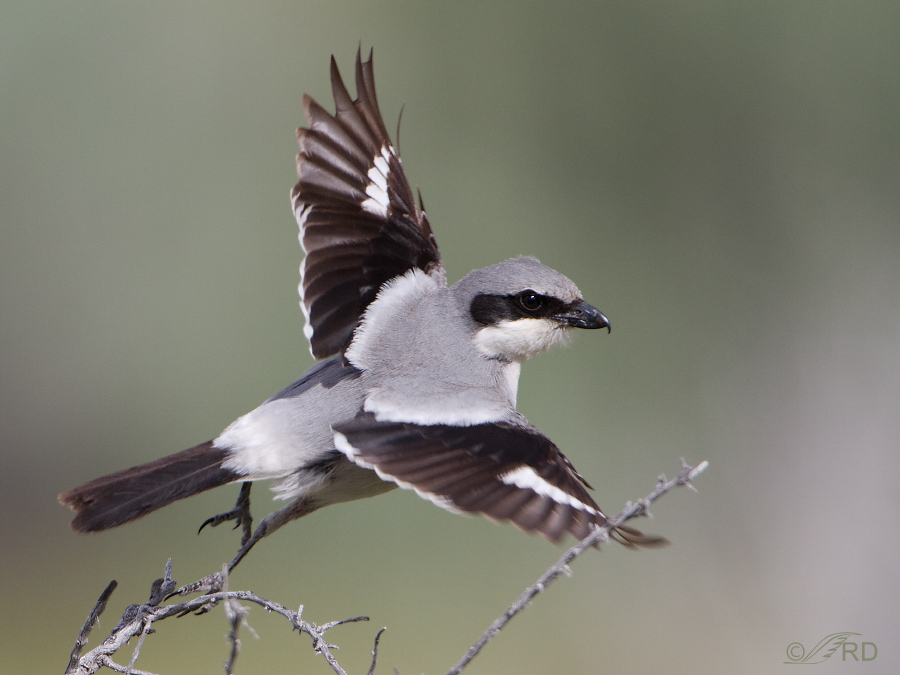
Canon 7D, 1/2000, f/6.3, ISO 500, EV +0.33, 500 f/4, 1.4 tc
Decide on a focusing strategy based on your prediction of likely take-off direction:
When the bird is facing either to my left or right and I think there’s a good chance it will take off in the direction it’s facing (and thus stay in approximately the same plane as it is perched) I will often pre-focus on the bird and not even attempt to maintain continuous focus as it flies off – in my experience I get a higher percentage of sharp shots that way because it’s so difficult to maintain focus on an accelerating bird that is flying laterally to me. If I have enough light to maintain adequate shutter speed I’ll also adjust my aperture (I shoot in aperture priority) to allow for a bit more depth of field “wiggle room”.
This Western Meadowlark was perched on a bush and facing to my left. I pre-focused, then adjusted my framing to give the bird room to fly into and hoped it would fly in the direction it was facing in roughly the same plane that it was perched. It worked.
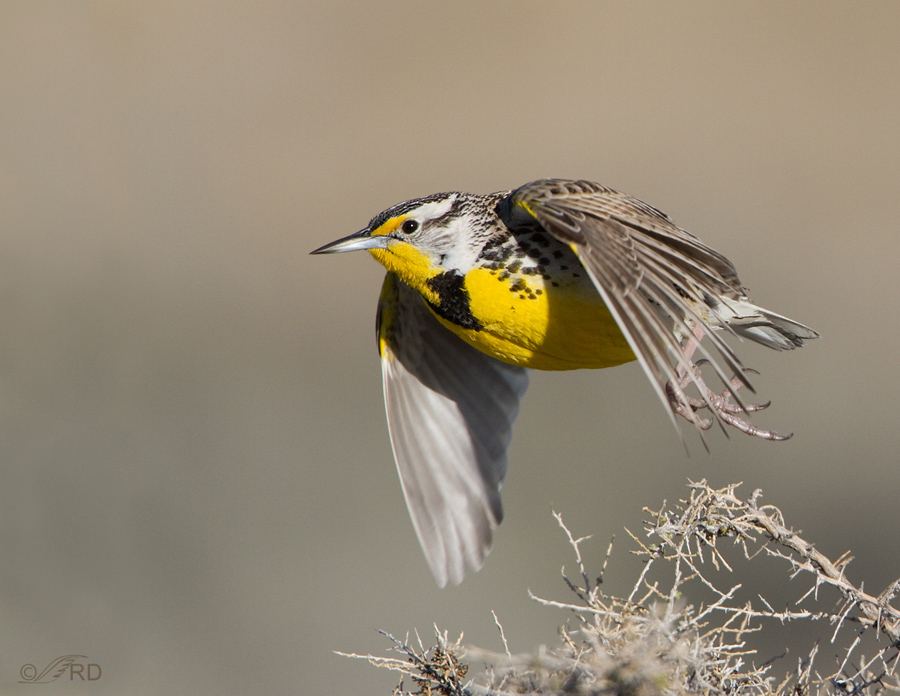 Canon 7D, 1/2500, f/6.3, ISO 500, EV +0.00, 500 f/4, 1.4 tc
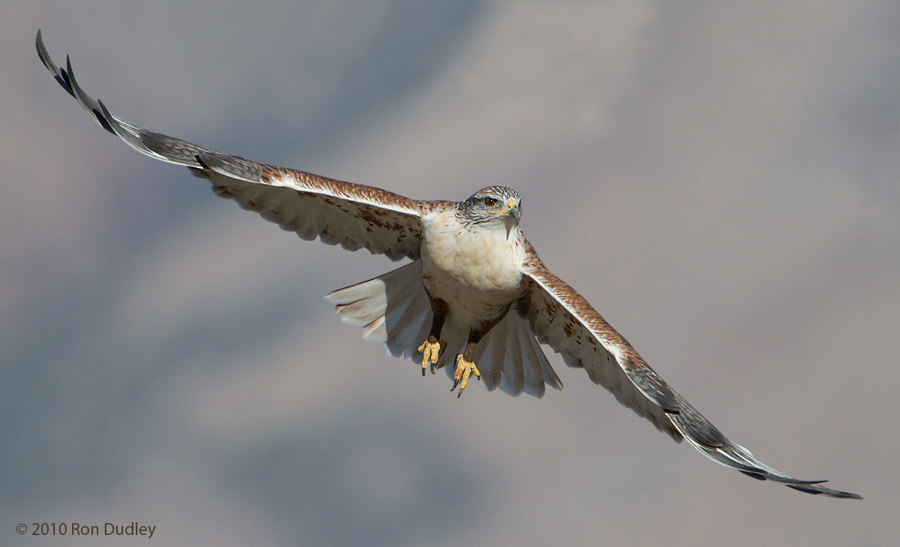
However, when the bird is facing me and looks like it might take off in my direction I’ll usually attempt to maintain focus on it as it comes my way. I find that I can maintain focus more consistently when it’s coming toward me and besides I would lose focus on the bird immediately anyway since it’s flying toward me.
This Ferruginous Hawk was perched on a fence post and facing me. I was able to stay locked on for several frames as it came my way. You can see from the position of the feet that it has just left a perch, which I cropped out at bottom.
Canon 7D, 1/4000, f/6.3, ISO 500, EV -0.33, 500 f/4, 1.4 tc
Know your subject to predict flight path:
By this I mean to watch for behaviors that are consistent with the species or with individual birds that can be used to prevent clipping body parts as they take off. For example, many heavy bodied raptors, when on a high perch like a telephone pole, will take off at a downward slant to use gravity to quickly increase flight speed. Knowing this often enables me to keep the whole bird in the frame as it takes off. Smaller birds will often repeatedly use the same perch when hunting (hawking) and will take off from it in a predictable manner.
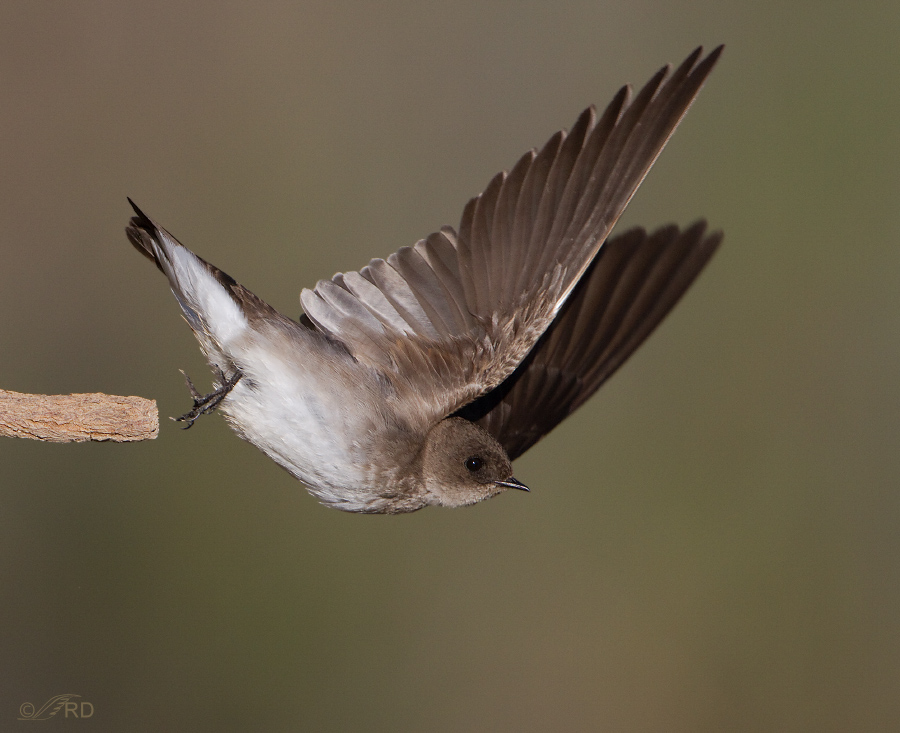
I watched this Northern Rough-winged Swallow (and perhaps a few of its friends) land on this perch sticking out from a riverbank many times. Each time the bird would stay on the perch for a short time and then take off toward the water surface below it to hunt for insects. It nearly always took off at a downward angle. Planning for this enabled me to avoid clipping anything as it took off.
Canon 7D, 1/2500, f/6.3, ISO 640, EV -0.33, 500 f/4, 1.4 tc
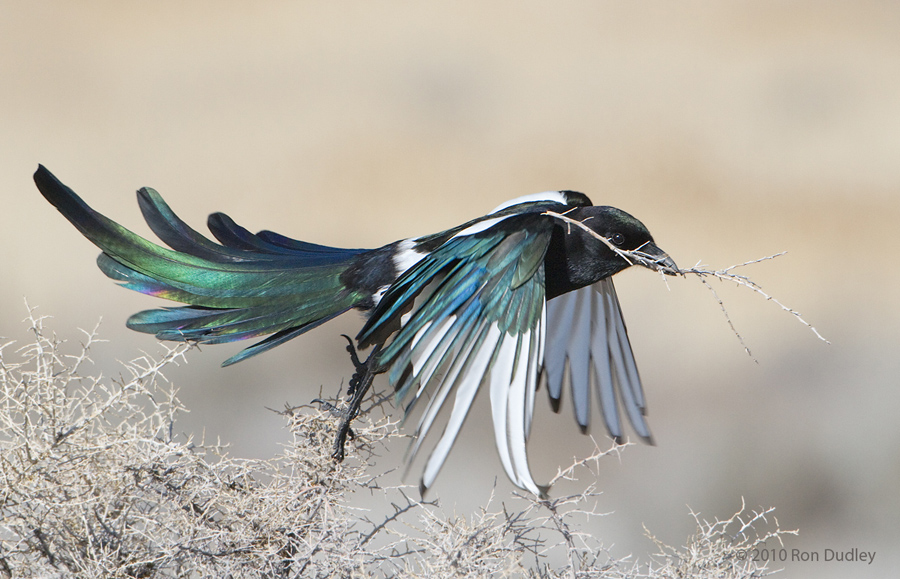
I had watched and photographed this Black-billed Magpie and it’s mate building their nest for many days. When bringing nesting materials to the nest site they would often land and take off from several nearby bushes on their way to the nest. The angle at which they would take off from each perch became fairly predictable and that fact likely prevented me from clipping anything in the image below. Don’t get me wrong – I cut off enough magpie parts to fill a dump truck over the several weeks I was shooting them but knowing their take-off habits certainly increased my “keeper” rate.
Canon 7D, 1/2000, f/8, ISO 400, EV -0.33, 500 f/4
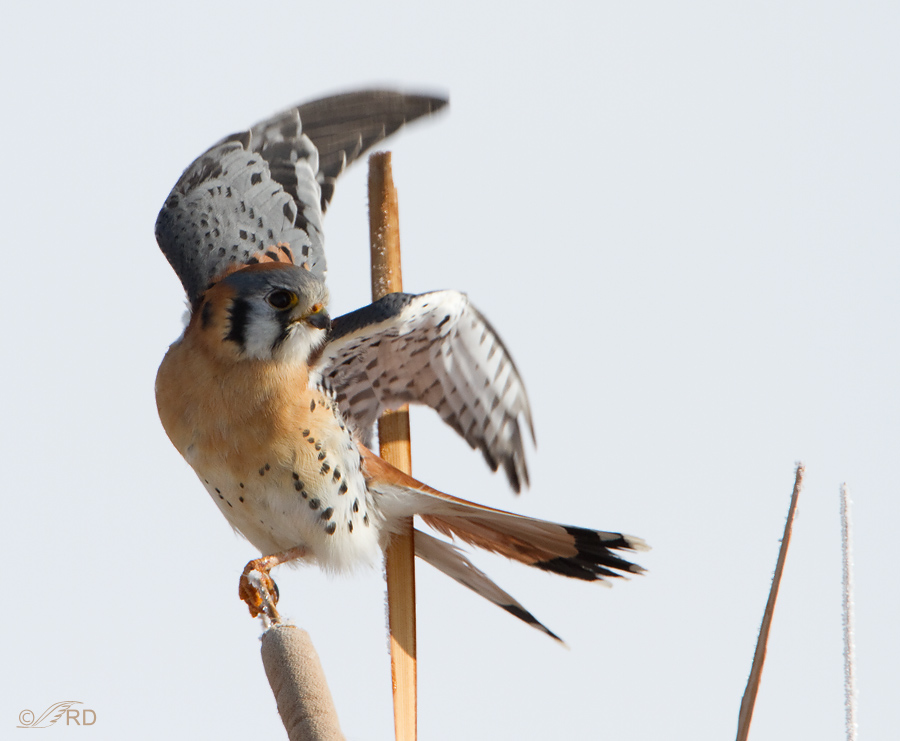
All that said, individual birds can still be fickle and unpredictable and a few species don’t have a predictable bone in their body! I’ve found that predicting take-off direction of the American Kestrel is nothing more than a crap shoot. They often will be facing and looking in one direction and take off in another (most birds do that occasionally but kestrels are the champs at it in my experience). They are just so agile, quick and athletic that getting take off shots of them is tough.
The kestrel below was on this cattail and facing to my left. If it had taken off in that direction (as I anticipated) I would have likely had good light on the face and body and perhaps not clipped anything. But as you can see he has twisted to his left (my right) and took off in that diresction so I didn’t get any light in the face and I cut off the bird in the next frame as he took off. That’s one of the things that makes bird photography challenging and fun – it ain’t easy!
I’m not including this image in this post because it’s any good (it isnt) but simply to illustrate how things can go wrong. The best laid plans of mice and men…
Canon 7D, 1/1600, f/7.1, ISO 400, EV +1.00, 500 f/4, 1.4 tc
Anticipate the potential need for a different exposure on the bird as it takes off:
Many birds have very light or almost white plumage under their wings, even when their overall plumage may be quite dark. Very often bird photographers will be shooting a perched bird for quite a while and getting what looks like a good exposure for the dark plumage on their screen. Then they’ll wait for the take-off and keep that same exposure, only to find they’ve blown the whites under the wings as the bird leaves the perch. I’ve done it many times. It really hurts to get a dynamic take-off pose and find that you’ve blown the whites. For take-off shots I’ll often knock my EV down by 1/3 from where I had it set when the bird was perched. There are many variables here though so there’s just no easy formula that always works. I just try to be especially cognizant of the potential for blown whites with this kind of shot and make adjustments that I think will work.
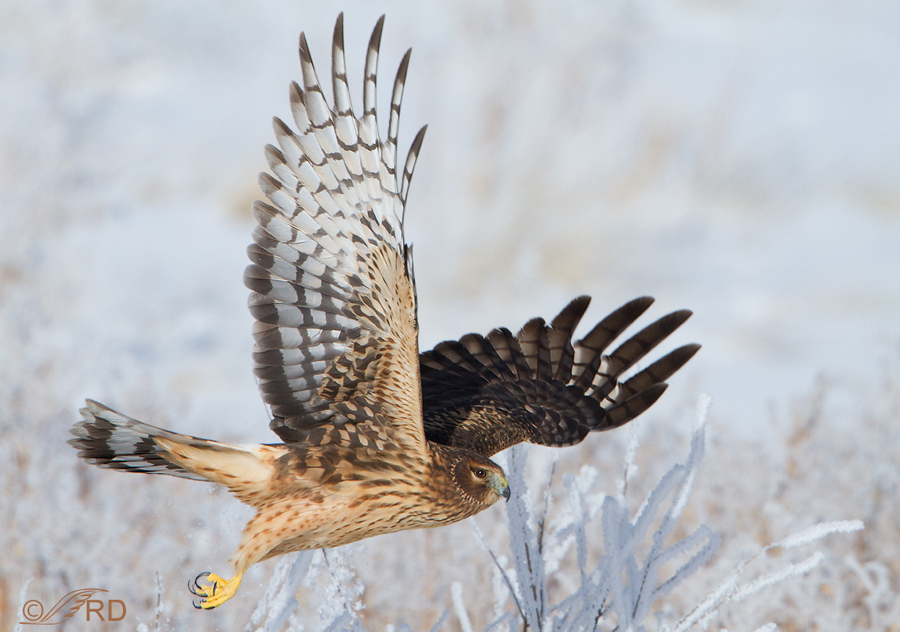
This Northern Harrier taking off from a snowy perch was a likely candidate for blown whites. My EV setting with this snowy background seemed to work well in this case, probably because this is a full frame shot and the relatively dark bird (against the white snow) pretty much filled the frame. I was simply lucky not to clip anything. Another thing that helped is that the brightest part of the bird, the notoriously difficult to properly expose white rump patch, was mostly turned away from me.
Canon 7D, 1/3200, f/7.1, ISO 500, EV +0.33, 500 f/4, 1.4 tc
Ugly perches are a fact of life:
Beautiful birds love to perch on ugly, unnatural perches – telephone poles, roofs, new fence posts, wires, bird houses, the list goes on and on. Take-off shots will often include those perches in the frame and they usually detract very much from the subject. If you’re lucky you can dispatch the perch by cropping, but often you cannot. Some resort to cloning the perch out of the image, which is an ethical decision each photographer must make. However, if it’s an attractive, natural perch it typically makes the image stronger, especially since it can look like something’s missing if the bird has just taken off and there’s only empty space where our brain tells us there should be a perch.
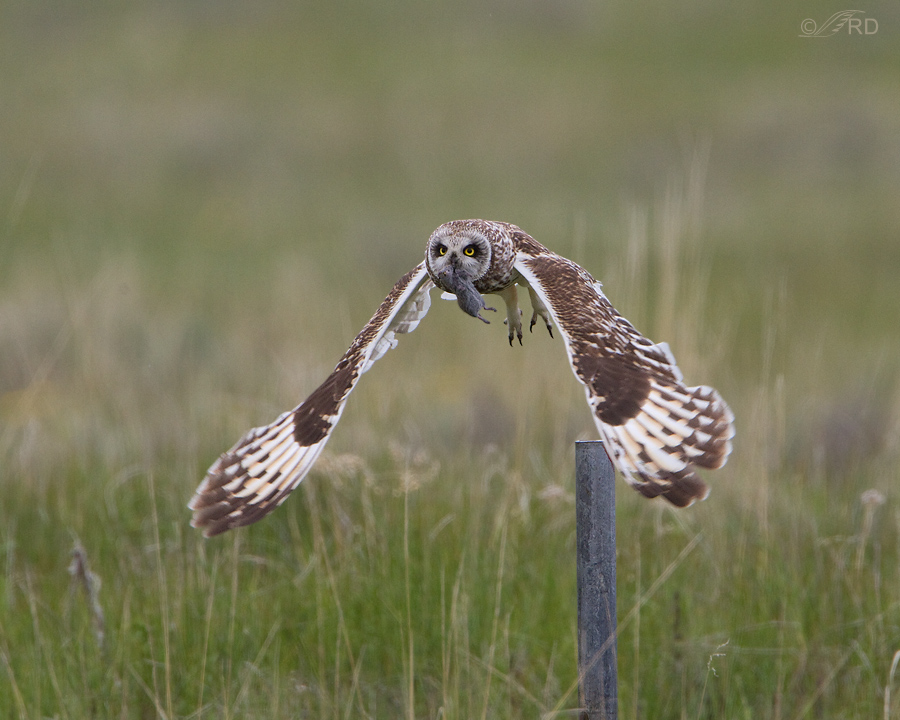
When I was shooting this male Short-eared Owl delivering voles to his family he would often perch on this ugly metal post, move the vole from his talons to his beak, and then take off toward the nest. I kept a few of these take-off shots but I deleted most of them because of the post. Ugly perches are just part of the bird photographer’s territory…
Canon 7D, 1/2000, f/6.3, ISO 640, EV -0.33, 500 f/4, 1.4 tc
A few final thoughts: A camera with a high burst rate is very helpful with these kinds of images, for obvious reasons. Take-off shots are difficult but highly rewarding when you get a good one so I’d suggest attempting it at every opportunity. Take lots of images – pixels are cheap and practice greatly improves your chances of success.
I wish you good luck and cooperative birds!
Ron


I love, love ,love your photos, but the tips about behavior are priceless. I’m learning so much,…can’ thank you enough. This is so very exciting and uplifting. I only hope the stabbed hawk made it.
Excellent article and tips for getting these difficult shots, I have some new things try out and obviously practice, practice, practice. Thanks for posting this Ron.
Regards,
Jim
Hey Ron, thanks for the always insightful tips. Your article just helped me avoid adding 10-15 questions to the “next time I talk to RD I gotta ask him…” list.
Never hard to look at a ferruge. Mike
Thanks for the time and effort here. Your work is both inspiring and educational for we greenhorns. This was an especially helpful post as I try to build my ambition and know-how to the point of capturing decent take-off and in-flight shots. I’ll be stopping by often.
Thank you for this representation of many, many hours of your work. I love them all. I am amazed at how different your magpies are to ours, which are black and white without any of the irredescance of yours.